-
Your shopping cart is empty!
Download Printable Version (PDF)
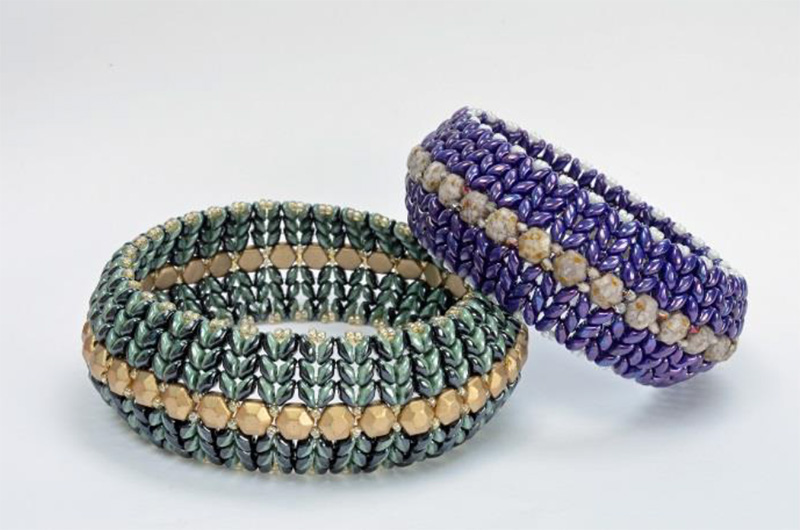
This project has a really simple thread path – in fact you may think you can work it out from just looking at the picture! The trick to making a successful bangle lies in the thread tension. So, this pattern gives you all the tips you will need in order to get that right. Follow the instructions carefully and do not be tempted to do things in a different order – it took me a lot of experimentation to get this just right, so if you follow my instructions, you can avoid a lot of bead frustration!
Materials – for an 8” (20cm) bangle
Tools: 2 beading needles and scissors
Skill Level: Intermediate and up
Techniques: Tubular Herringbone
Really, Really Important Stuff Before you begin…
As the introduction mentioned, your success in creating a bangle that is stiff enough to hold its shape will depend on how well you follow my instructions. So however strange the order, do not be tempted to think that you know better! I have grown to love this design, but I initially hated it because the frustration of getting it right just got the better of me. I lost count of the number of times I took this apart because the tension wasn’t working and because I thought I could try a short cut to do it better. The short cuts didn’t work, so however much you may think I’ve lost my sanity and wonder why I’m doing things in an order that may not make sense to you, just stick with it and trust me.
The thread and materials are also important. I cannot emphasise this enough, but tension is key for this bangle, so if you try using a different beading thread, I cannot guarantee the results. To my mind, one of the many benefits of fireline is its ability to create a strong tension. Nylon-based beading threads have a little bit of ‘stretch’ in them, so even if you stretch them before you start, there is still a danger that they will stretch further as you bead. With this bangle, you really want everything to stay where you have put it, not move later on!
Definitely use Miyuki brand seed beads as different brands may vary in size slightly, so again, I cannot guarantee the results will be the same with a different brand. They may say that a bad workman blames his tools, but in this case, the tools (or materials) really can make or break the project!
If you are using Honeycomb Jewels, then make sure that you pick them up carefully so that the ‘right’ side (this is the dome shaped side) will be facing the front of the bangle, with the flat side against your wrist. If you have elected to use normal Honeycomb beads, then you need not worry about this as they are flat on both sides.
I originally made this bangle to showcase the Superduo Duets, but it works just as well with ordinary Superduos too. If you are using the Duets, then you need to take care to pick them up from the correct side to keep the colouring. Start by deciding which colour is going to sit on the outside of each pair – let’s call this colour 1. Every time you pick up a new pair of beads, you will enter the first bead from colour 1 side and the second bead from the colour 2 side.
Whichever multi-hole beads you are using, remember to check that both holes are clear before you use the bead – believe me, you do not want to unstitch this bangle part way through, but that is precisely what you will need to do if you find a blocked hole in a bead that you have already added.
I had some True2 beads that I thought would add a little sparkle to the embellishment around the centre, so I used them on one of my bangles. On the other, I just used the seed beads, so you can try either.
Now you have read and digested all those tips, you’re ready to begin…
Step 1: Cut a double arm-span of thread. Yes, this is a very long length, but you will need it and you really do not want to join new thread mid-project as this will weaken the finished bangle. Fireline shouldn’t tangle badly – or if does knot, the knots will come out easily – but if you struggle with the length, you can use a bobbin to keep the tail thread in check and just take care with the working thread. The following instructions will make an 8” bangle – adjust the bead count to suit your wrist size.

Step 2: Pick up 2(A), 2(B) thirty-six times. If you are concerned about counting the beads, then this will be a total of 72(B), so pull those out to one side before you start. Remember, if you are using the Duets, keep a close eye on the colouring as I described above.
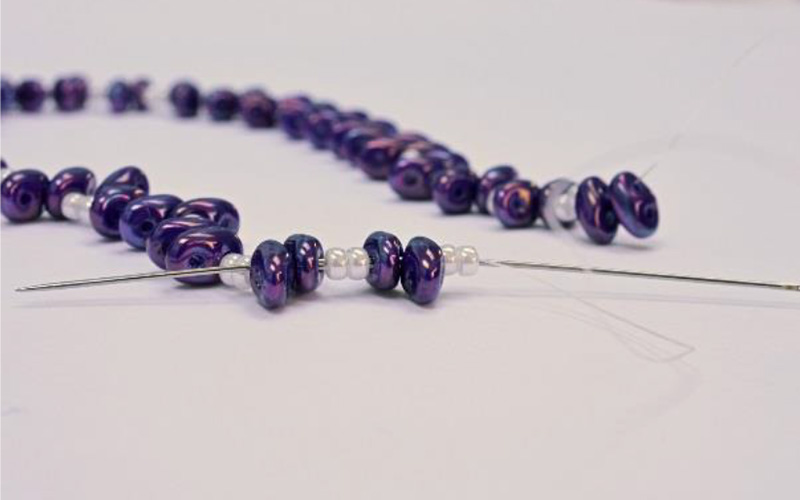
Step 3: Slide the beads along so that you leave a tail thread of at least 16” (40cm). Now pass through the first eight beads again, so your line of beads is formed into a circle. You will be passing through the same hole in the Superduos that you have already used. You should be exiting from a (B). Check the size here to make sure that your circle will fit over the widest part of your hand.
Step 4: Pull the working thread and tail thread tight, so your circle of beads will close up. Do not knot the threads and do not be tempted to pass through any additional beads. Also, make sure that the tail thread does not shorten – it’s a great idea to use a bead stopper to make sure your tail thread stays at 16”. Now pass through the second hole in your (B), so you will have set yourself up to travel around the circle in the opposite direction and you should be exiting from the point that is between 2(B) beads.
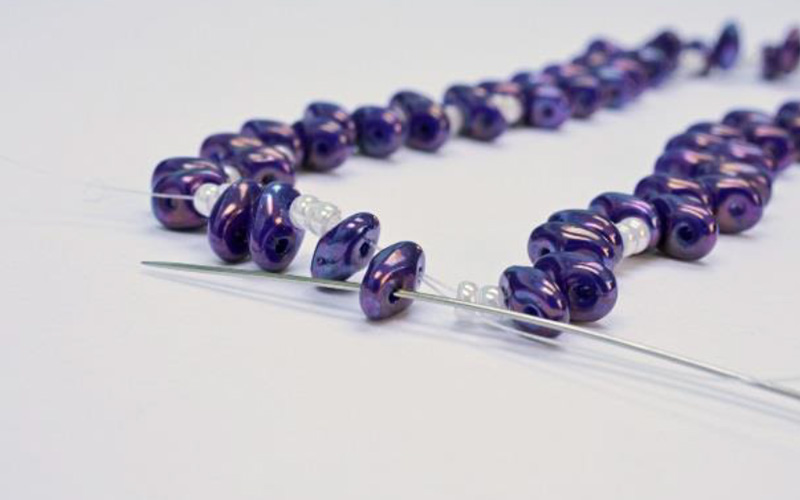
Step 5: Pick up 2(B) and pass through the second hole (the empty hole) on your next 2(B), so this should be the second bead in your pair and the first bead in the next pair. Again, if you are using the Duets, remember to keep your colouring consistent.
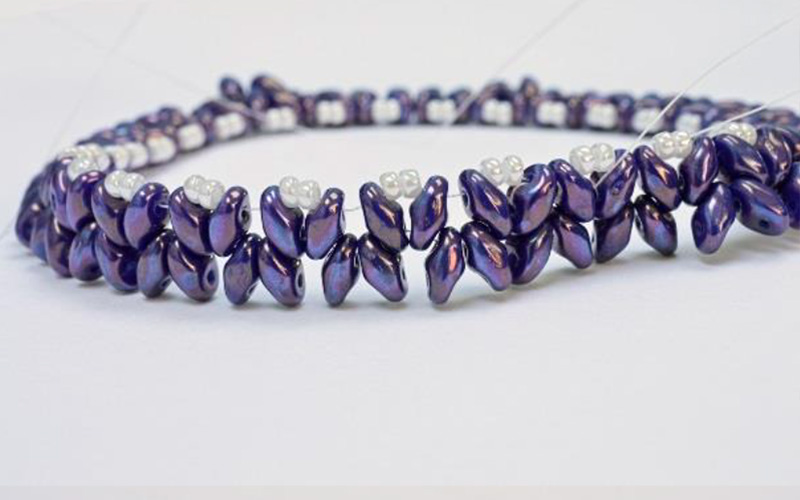
Step 6: Keep repeating step 5, all around the circle. As you work, keep your tail thread pulled up tight, so do not allow it to get pulled through the beads. The outer circle (part with the seed beads) will loosen a little (as you can see in the photo), but you want to encourage it to stay as tight as possible so that the next step will be easier. At the same time, keep a really tight tension with your working thread as you add this new row. Take care that the beads do not twist as you pull them in tight. When you have added all the beads, pass around this row once more and this will help to tighten up the tension as well as strengthening the structure.
Step 7: Thread a second needle onto your tail thread, leaving the working thread alone for the moment. Start by pulling the tail thread as tight as you can, so you pull the top circle in as much as possible – this is why I said not to go through more than 8 beads back in step 4. Now weave through all the (A) and (B) beads in this top row, pulling up tight to pull the circle inwards. Continue to weave until you have almost run out of thread on the tail, so this may take you more than once around the circle, but you do want to complete at least one full pass around it. When you are happy that the circle is completely tight, pass through to exit from a (B), weave through the second hole in this bead to change direction, then weave on through and finish your tail thread by knotting between beads. Do not be tempted to try finishing the tail thread any earlier, or any later in the process – this is the point that will give you the best tension…trust me, I tried some alternatives and the results were not good!
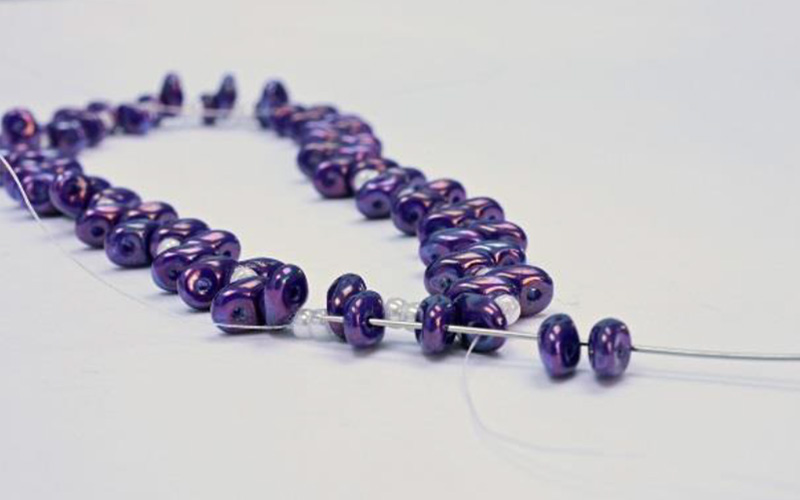
Step 8: Return to the working thread and pass on until you are exiting from the first (B) in a pair from your previous row (the initial circle). Step up by passing through the second hole in the next (B), so you will not change direction, just move forward. You should find that you are exiting from the second (empty) hole in the first bead in a pair of the beads that you added in step 5-6. You are now ready to repeat steps 5 and 6 to add a third row of (B) beads.
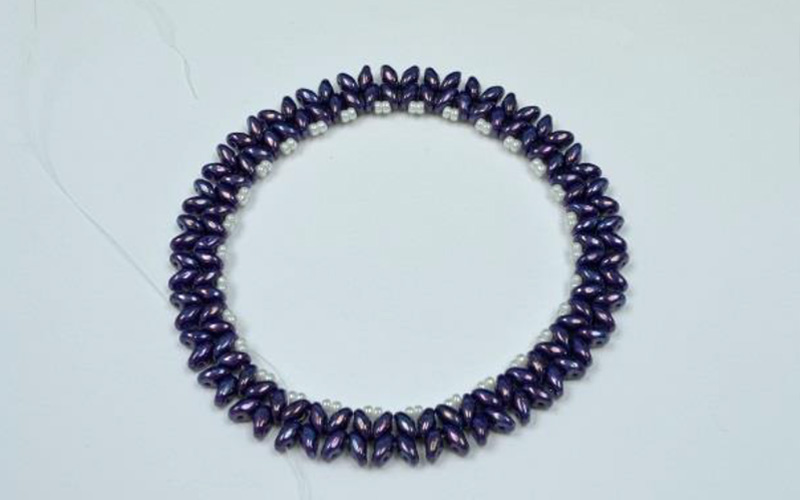
Step 9: Again, at the end of the row, pass through all the beads once more to tighten the tension and reinforce the bangle. If you have got the tension right, then your flat circle should be pulling down into a tube as the photo shows.
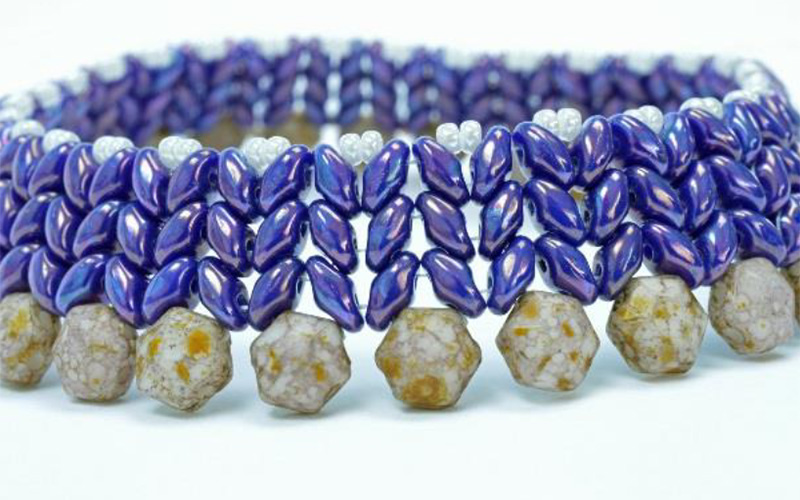
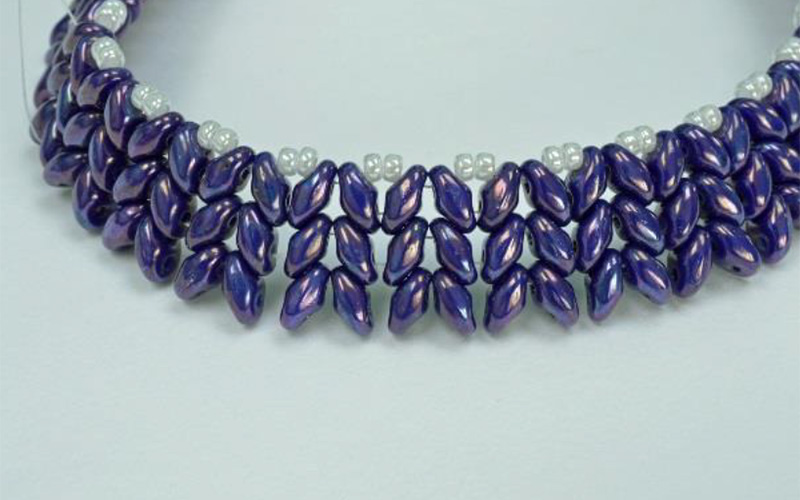
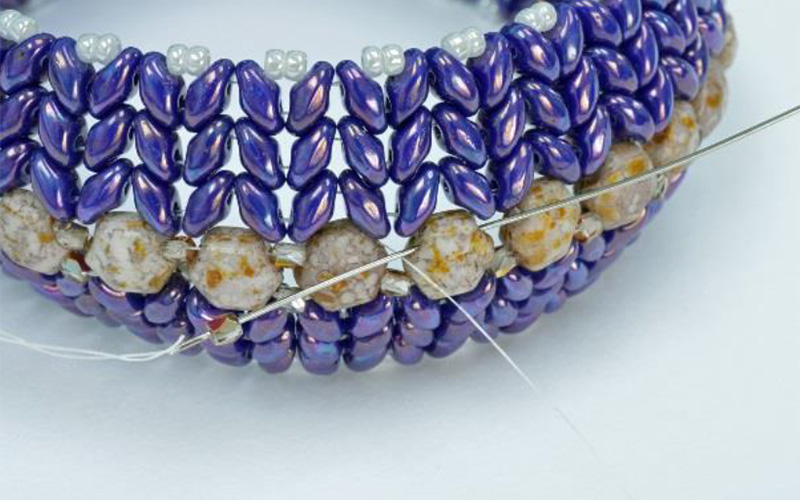
Step 10: Once again, step up as you did in step 8, so you will be exiting from the second hole in the first (B) in a pair that you added in step 8. Pick up 1(C) and pass through the second hole of the next 2(B) – ie the second in your existing pair and the first in the next pair. In case you haven’t spotted it, you are actually working in tubular Herringbone. Keep repeating this all the way around the row. At the end of the row, weave through all the beads in this row once more. End up exiting from a (C).
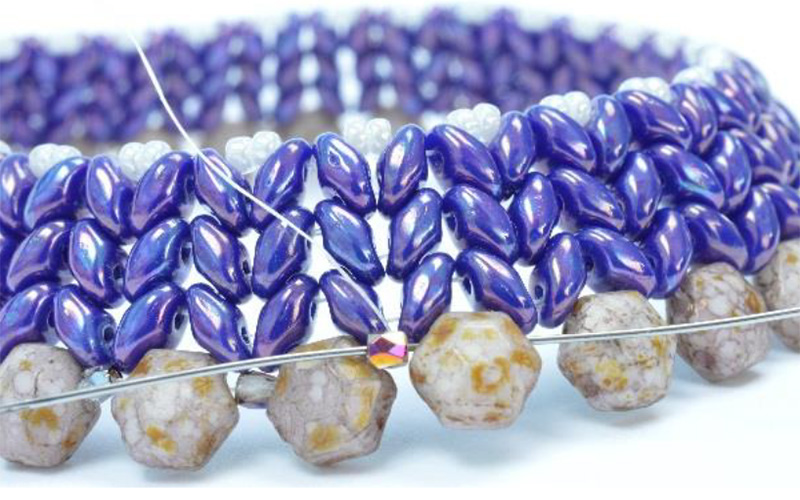
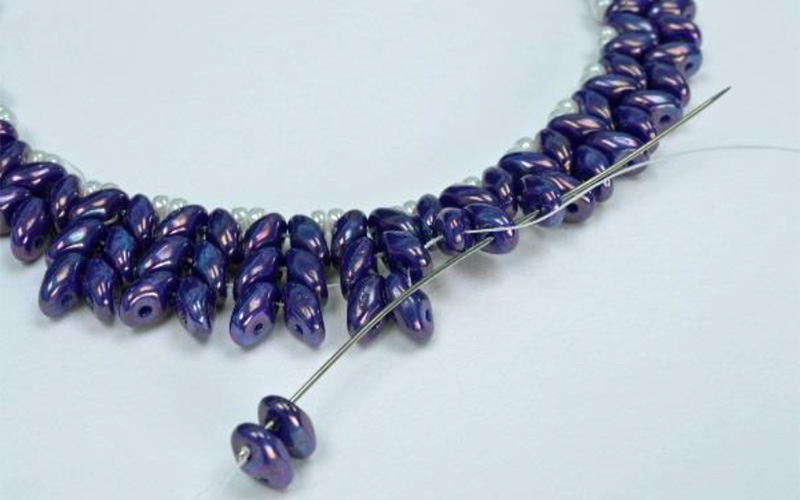
Step 11: Pick up 1(D) if you are using them, or 1(A) and pass through the next (C), moving through the same hole that is already being used. Repeat this all the way around the row. The (D) or (A) beads just add a touch of embellishment and fill in the natural gap around the Honeycombs. Once again, when you have completed the row, pass around all the beads one more time for security. This completes the first half of the bangle, so you can finish your working thread securely by weaving back into an earlier row and knotting between beads as you weave through.
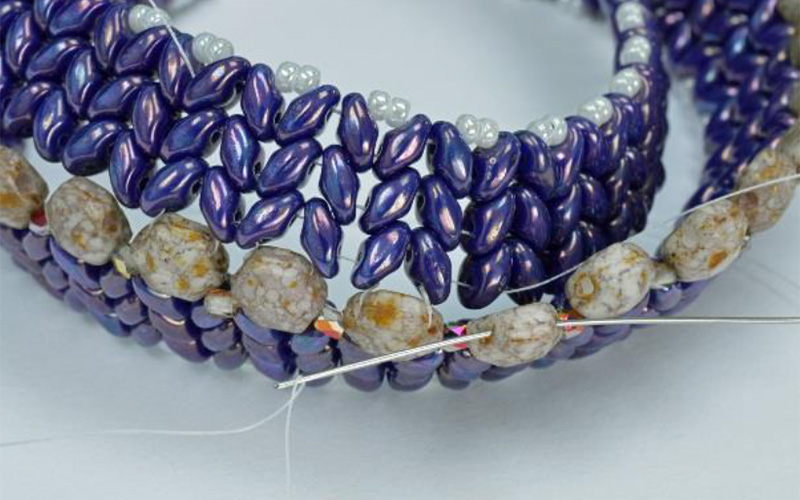
Step 12: Repeat steps 1-9 to make the second half. You are now going to repeat step 10, but instead of picking up a new (C), you will pass through the empty hole on the (C) beads on the first half of the bangle, so this will join the second half to the first. Once again, when you have completed the row, weave through all the beads to reinforce everything.
Step 13: Repeat step 11 to add the (D) or (A) beads to this half of the bangle. Then finish your thread securely and your bangle is ready to wear.
Designed by Katie Dean © 2016.